")
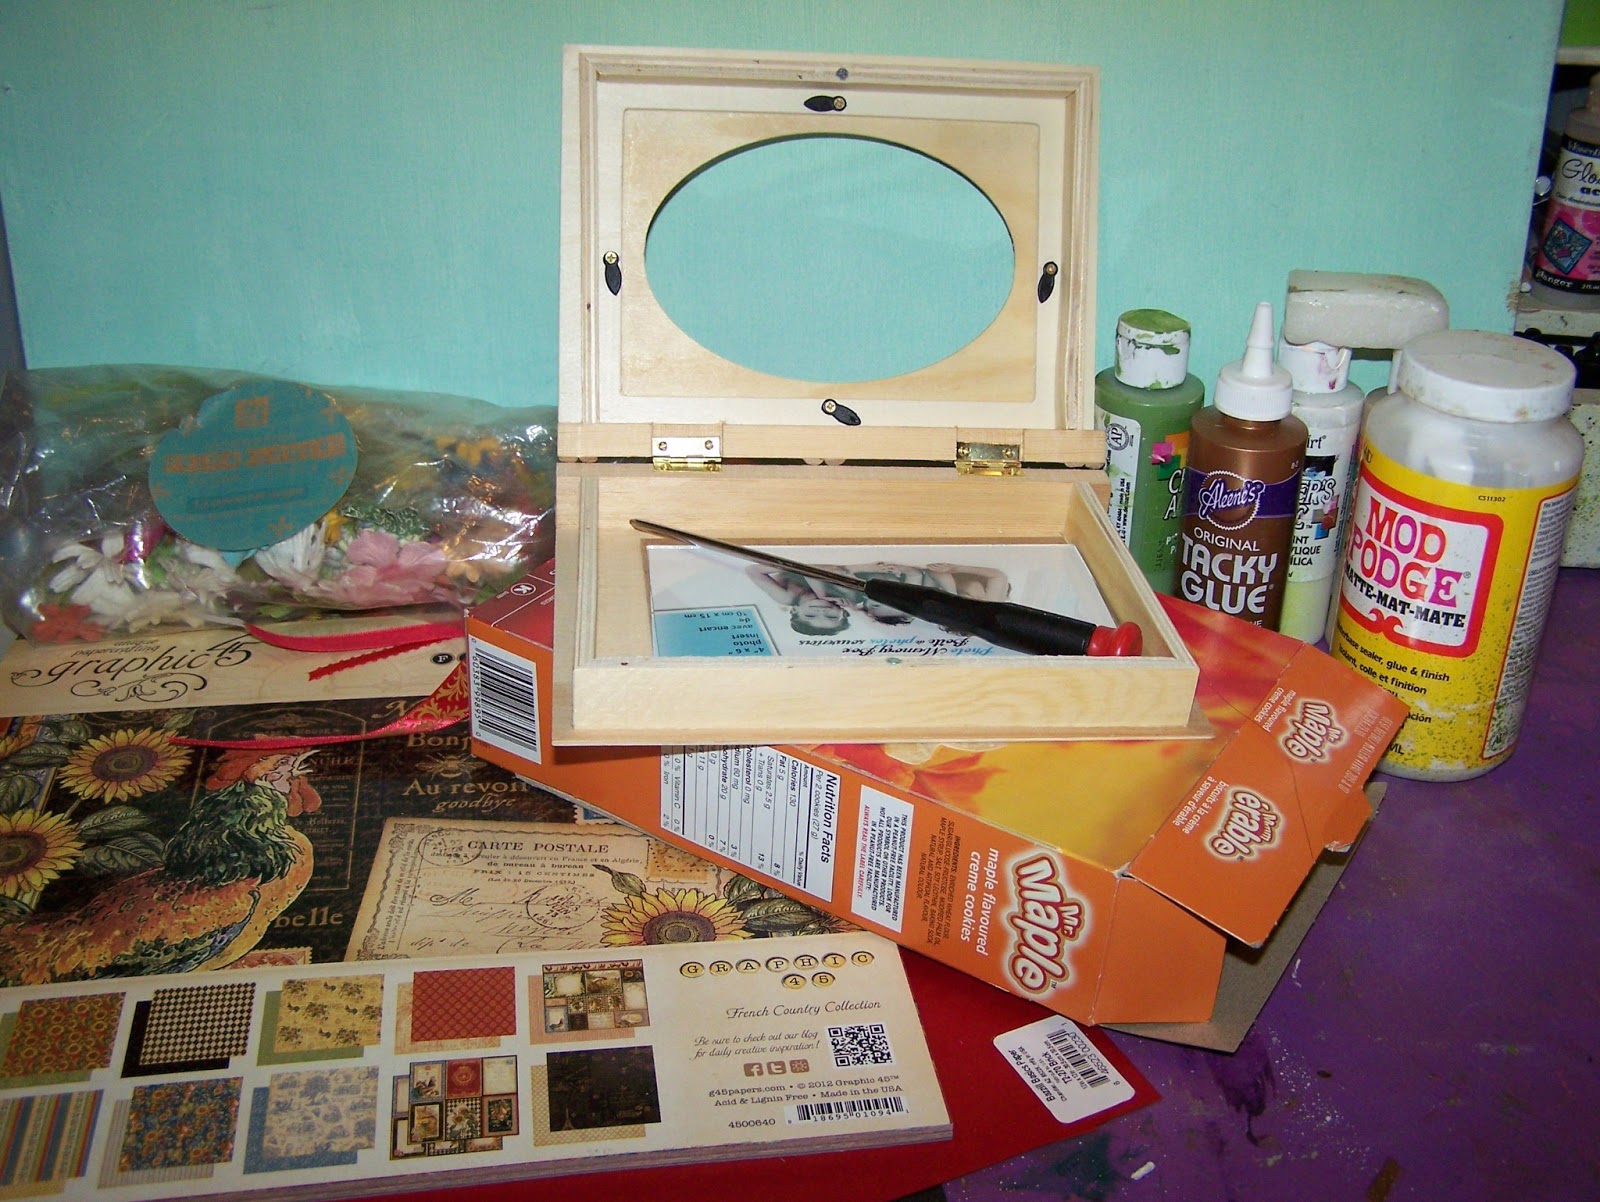
Materials:
Wooden photo memory box (Dollarama)
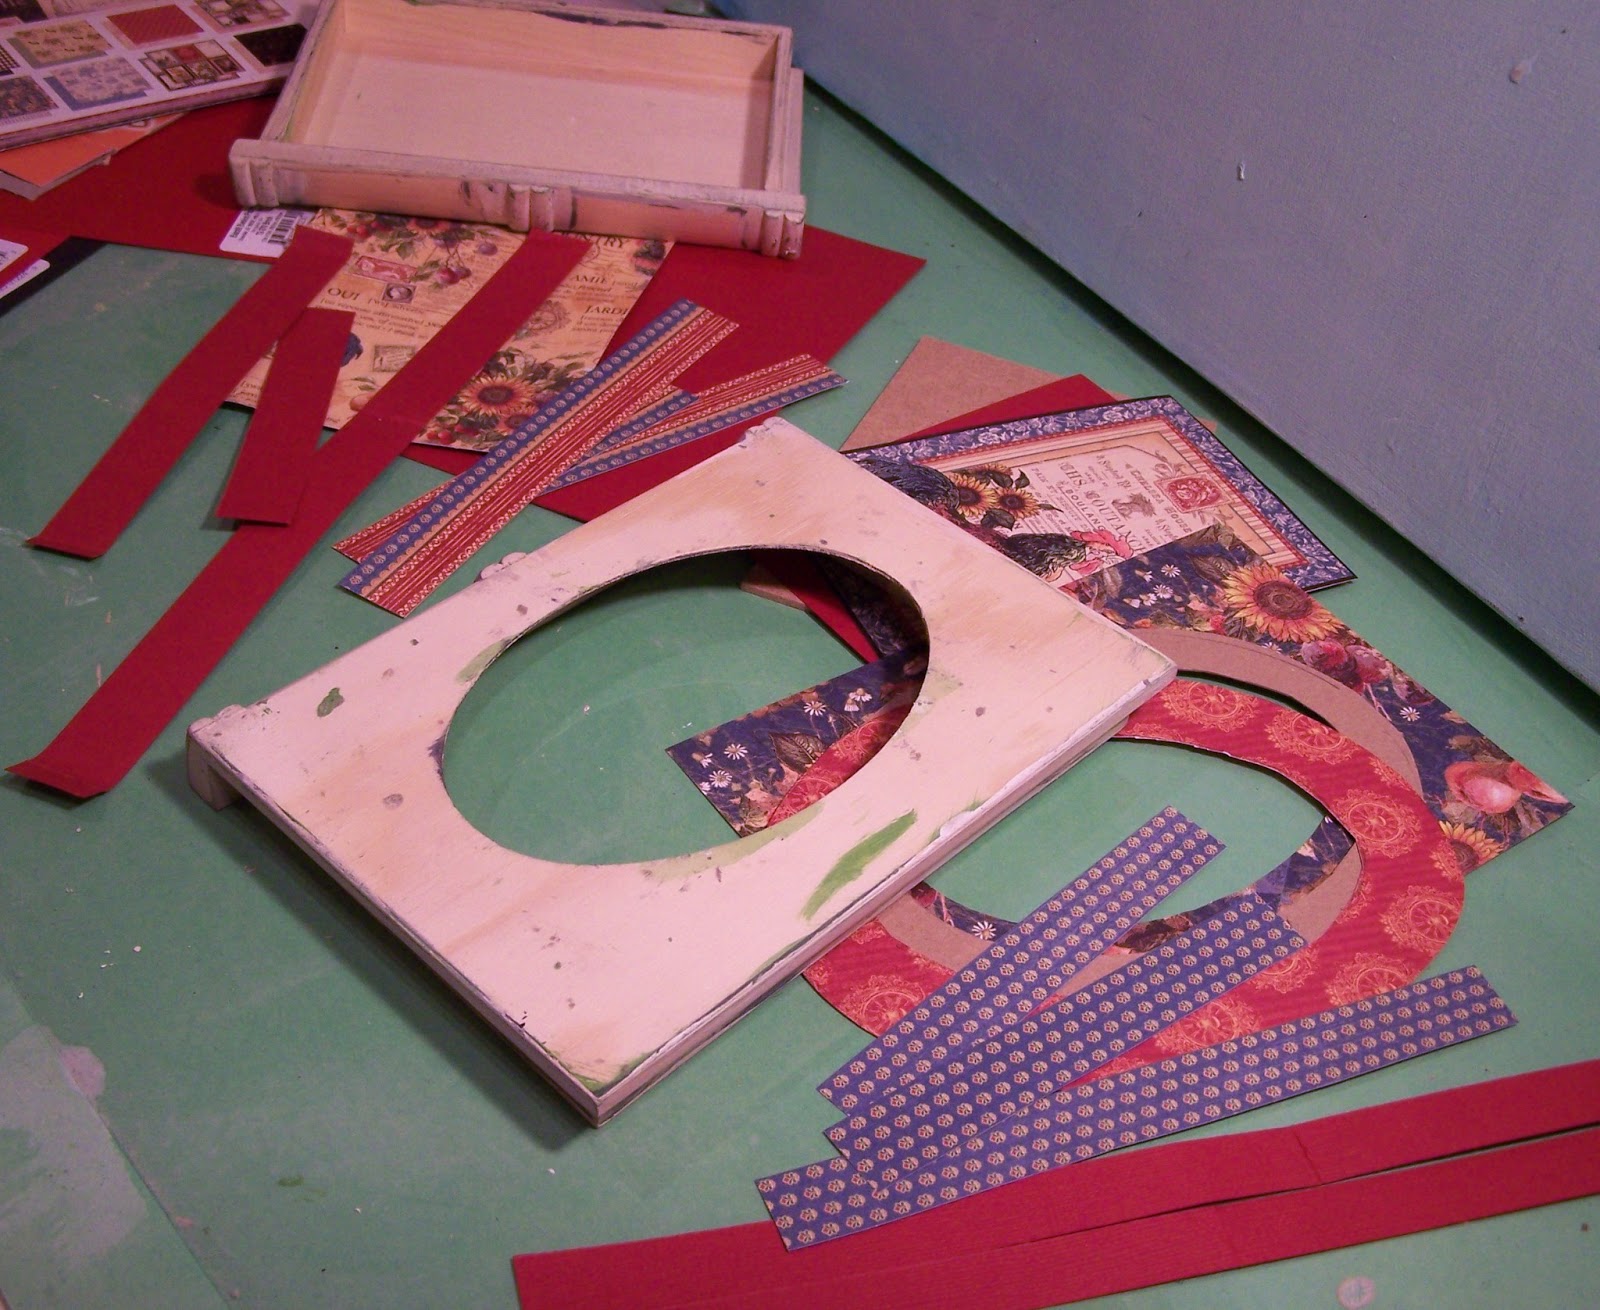
Graphic 45 - French Country Collection papers
Bazzill Basics Paper - Pomegranate
Prima Flowers - Botanical Mix
Tim Holtz Distress Ink – Tea Dye
Brown buttons
Aleene’s Tacky Glue
Mod Podge
Foam pop dots
Sanding block
Acrylic paint (leaf green, tan, ultramarine blue, black, white)
Paraffin wax
(the cookie box is the perfect size for a matching gift box)

Begin by removing the box hardware. Keep the pieces in a plastic bag for reassembly (those little screws are hard to find)
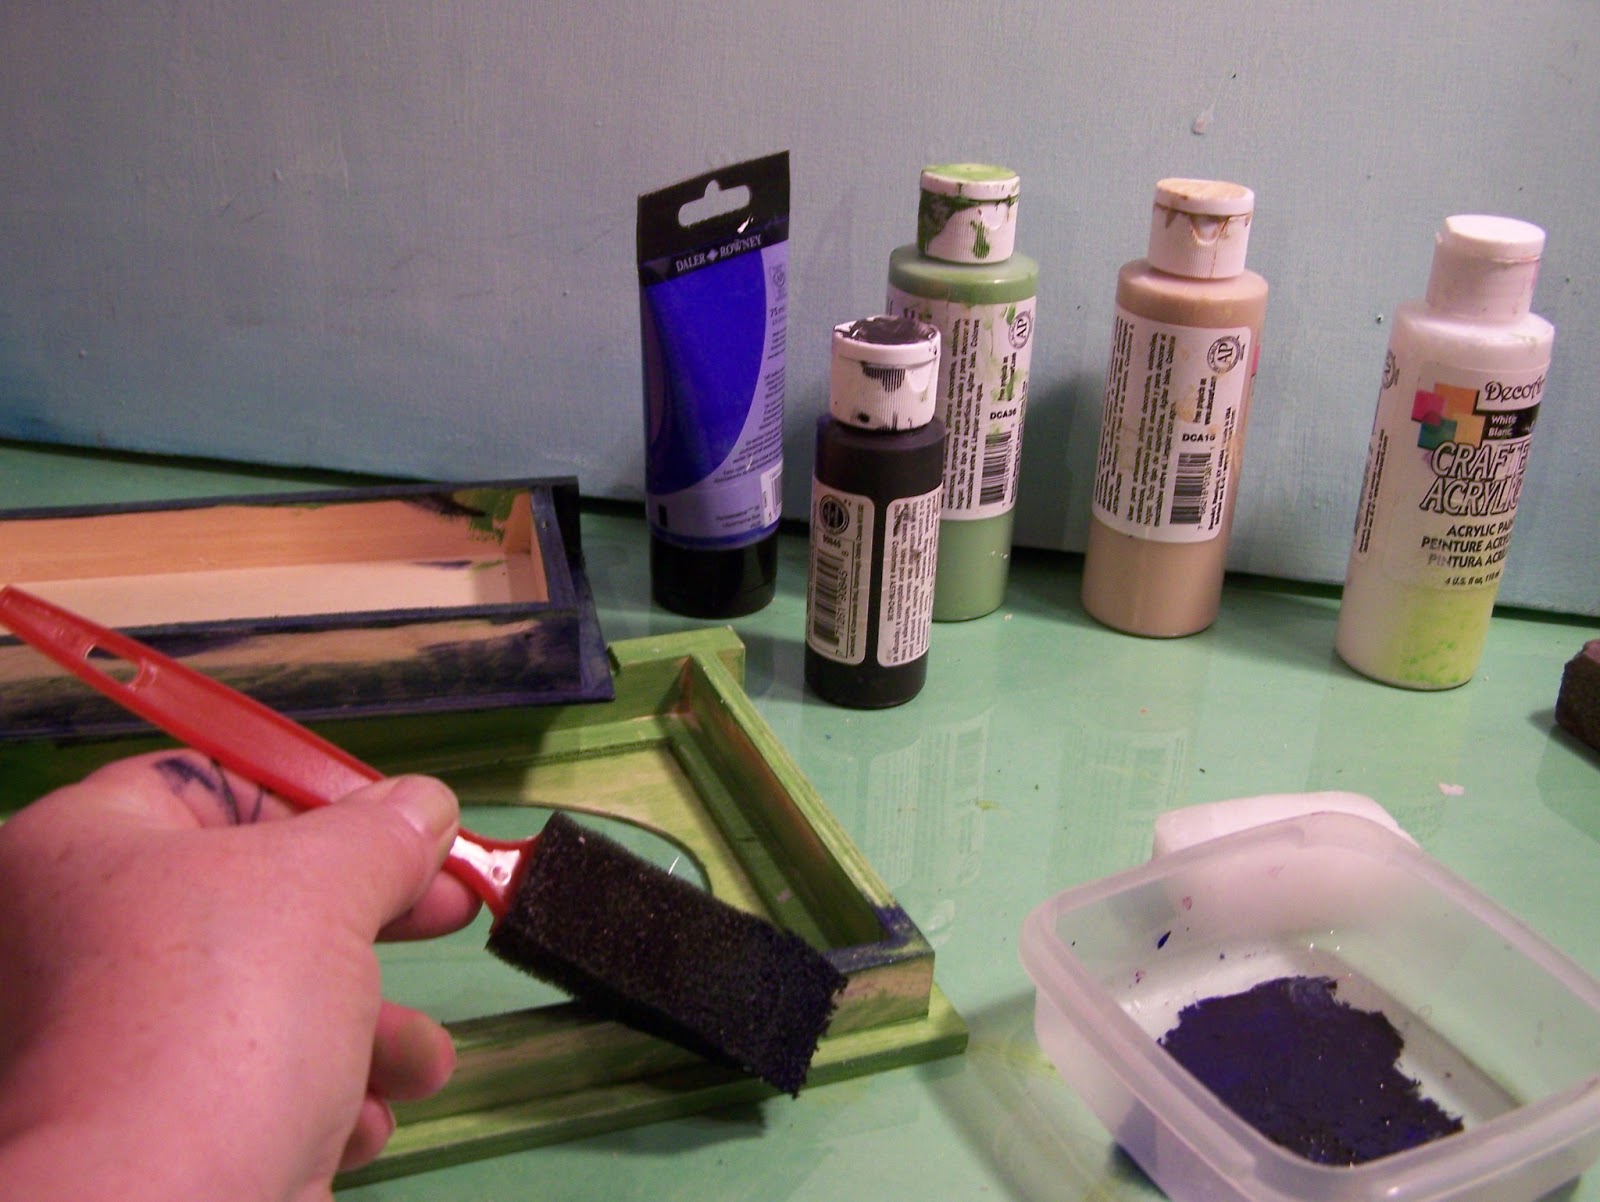
You have the option of painting/staining the box a solid colour or distressing the areas that will not be covered with
paper (book cover edges, spine decorations, inside box edges, etc.). This tutorial covers distressing to give those areas a vintage
appearance by sanding through several layers of paint.
To start rub paraffin wax on places that would show more wear over time
- edges, patches here and there. (This
will make it easier to sand through the paint layers.
Apply the first layer of paint – leaf green. Let dry thoroughly then apply more wax. Apply the second layer of paint (I chose ultramarine blue and black
roughly mixed to coordinate with the paper).
Again, let dry and apply wax. For the final coat of paint I used tan and white roughly mixed – let
dry.

Sand the surface with medium grit sandpaper (60 or 100) to reveal the
various layers of underlying paint. (looks pretty awesome, right?)
 Bazzill Basics Paper – Pomegranate – outside back cover and photo
insert
Bazzill Basics Paper – Pomegranate – outside back cover and photo
insert
Graphics 45 French Country Collection:
Deja Vu - outside edges and spine
Promenade – bottom inside
A La Carte – photo insert
Abundance – top outside
Rendezvous – frame cover
TIPS:
- Pay particular attention to the direction of your paper relative to the top and bottom of your project. This pattern has a top and bottom, while the plain paper has a textured and non-textured side.
- Keep your scraps in a ziplock bag or small plastic container – even the smallest piece can be used for a ribbon or flower petal

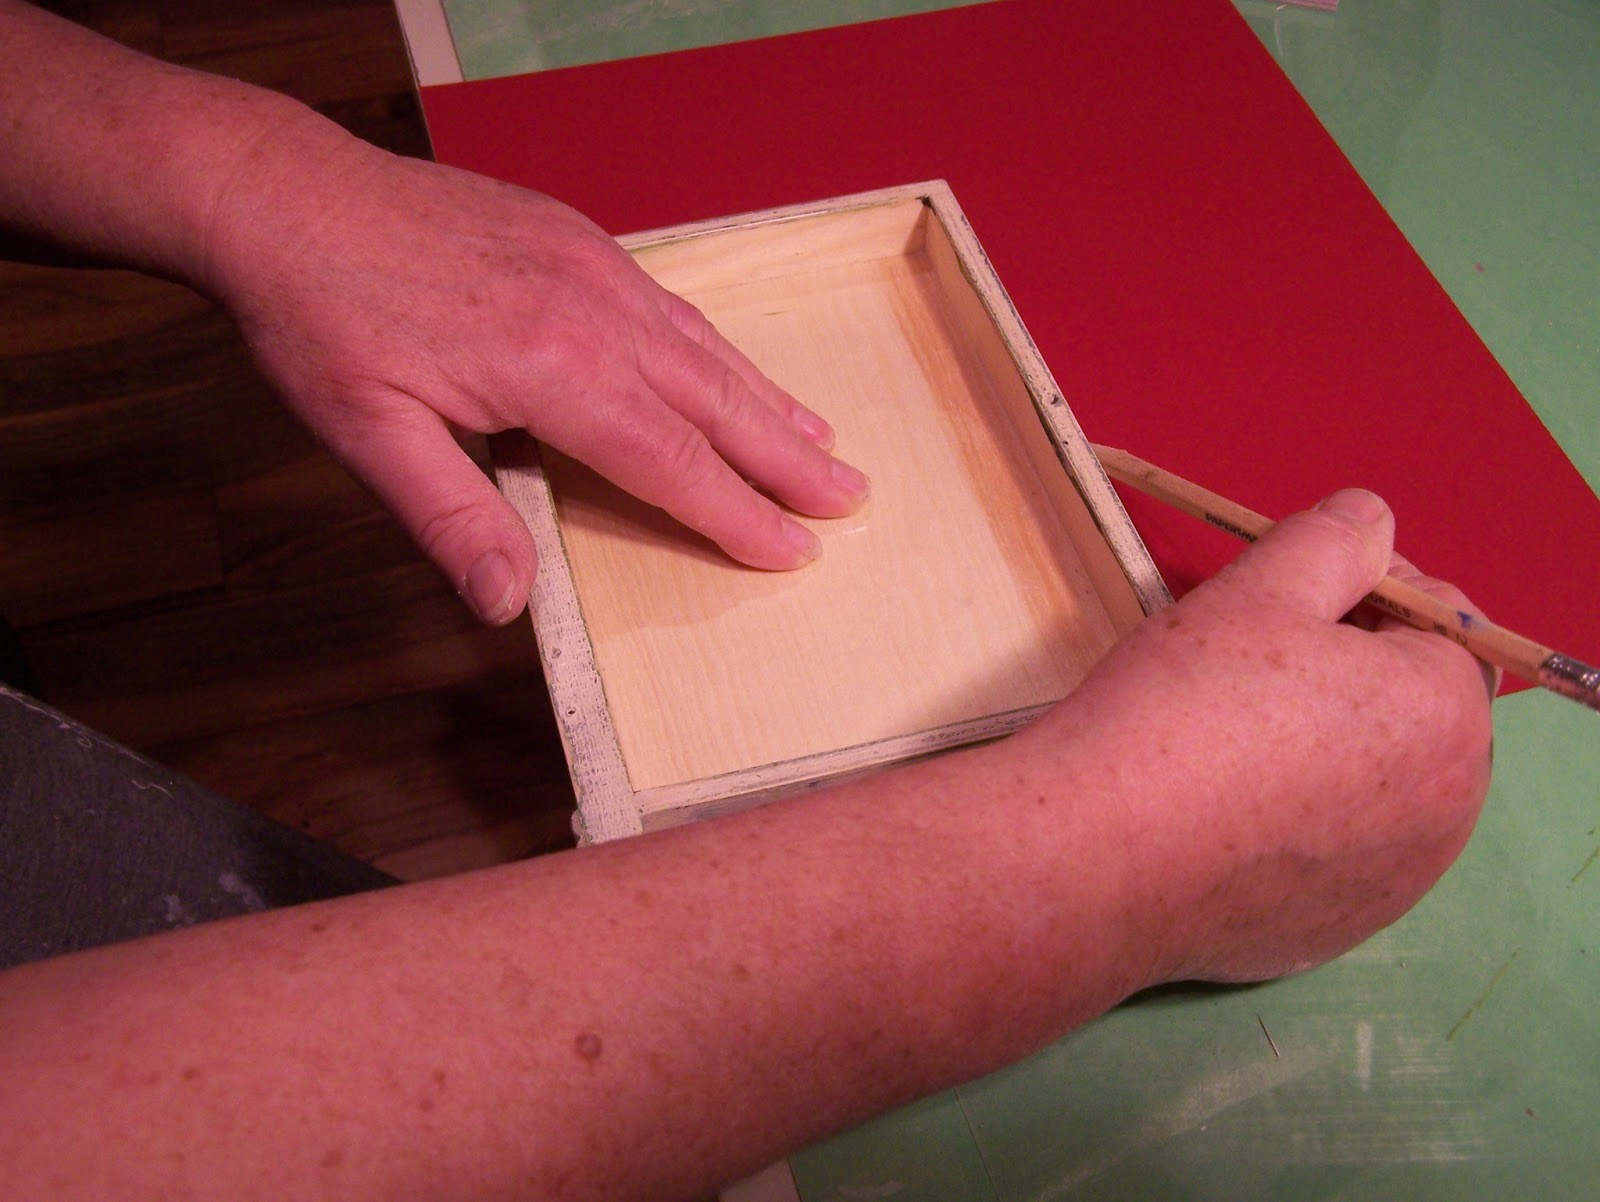
Use the cut-out from the photo insert oval as a template to make a
chipboard frame. After cutting out the
oval use a piece of paper cut to the width you want for the frame (e.g. ½”) and
mark lines around the oval.

Connect these marks then cut along them to make the frame. To cut the covering paper put the Rendezvous
paper face down with the frame face down on top of that. Draw around both the inside and the outside
the frame – then draw a ¼” fold-over allowance both inside and outside the
frame lines. Cut the paper on the
allowance lines.
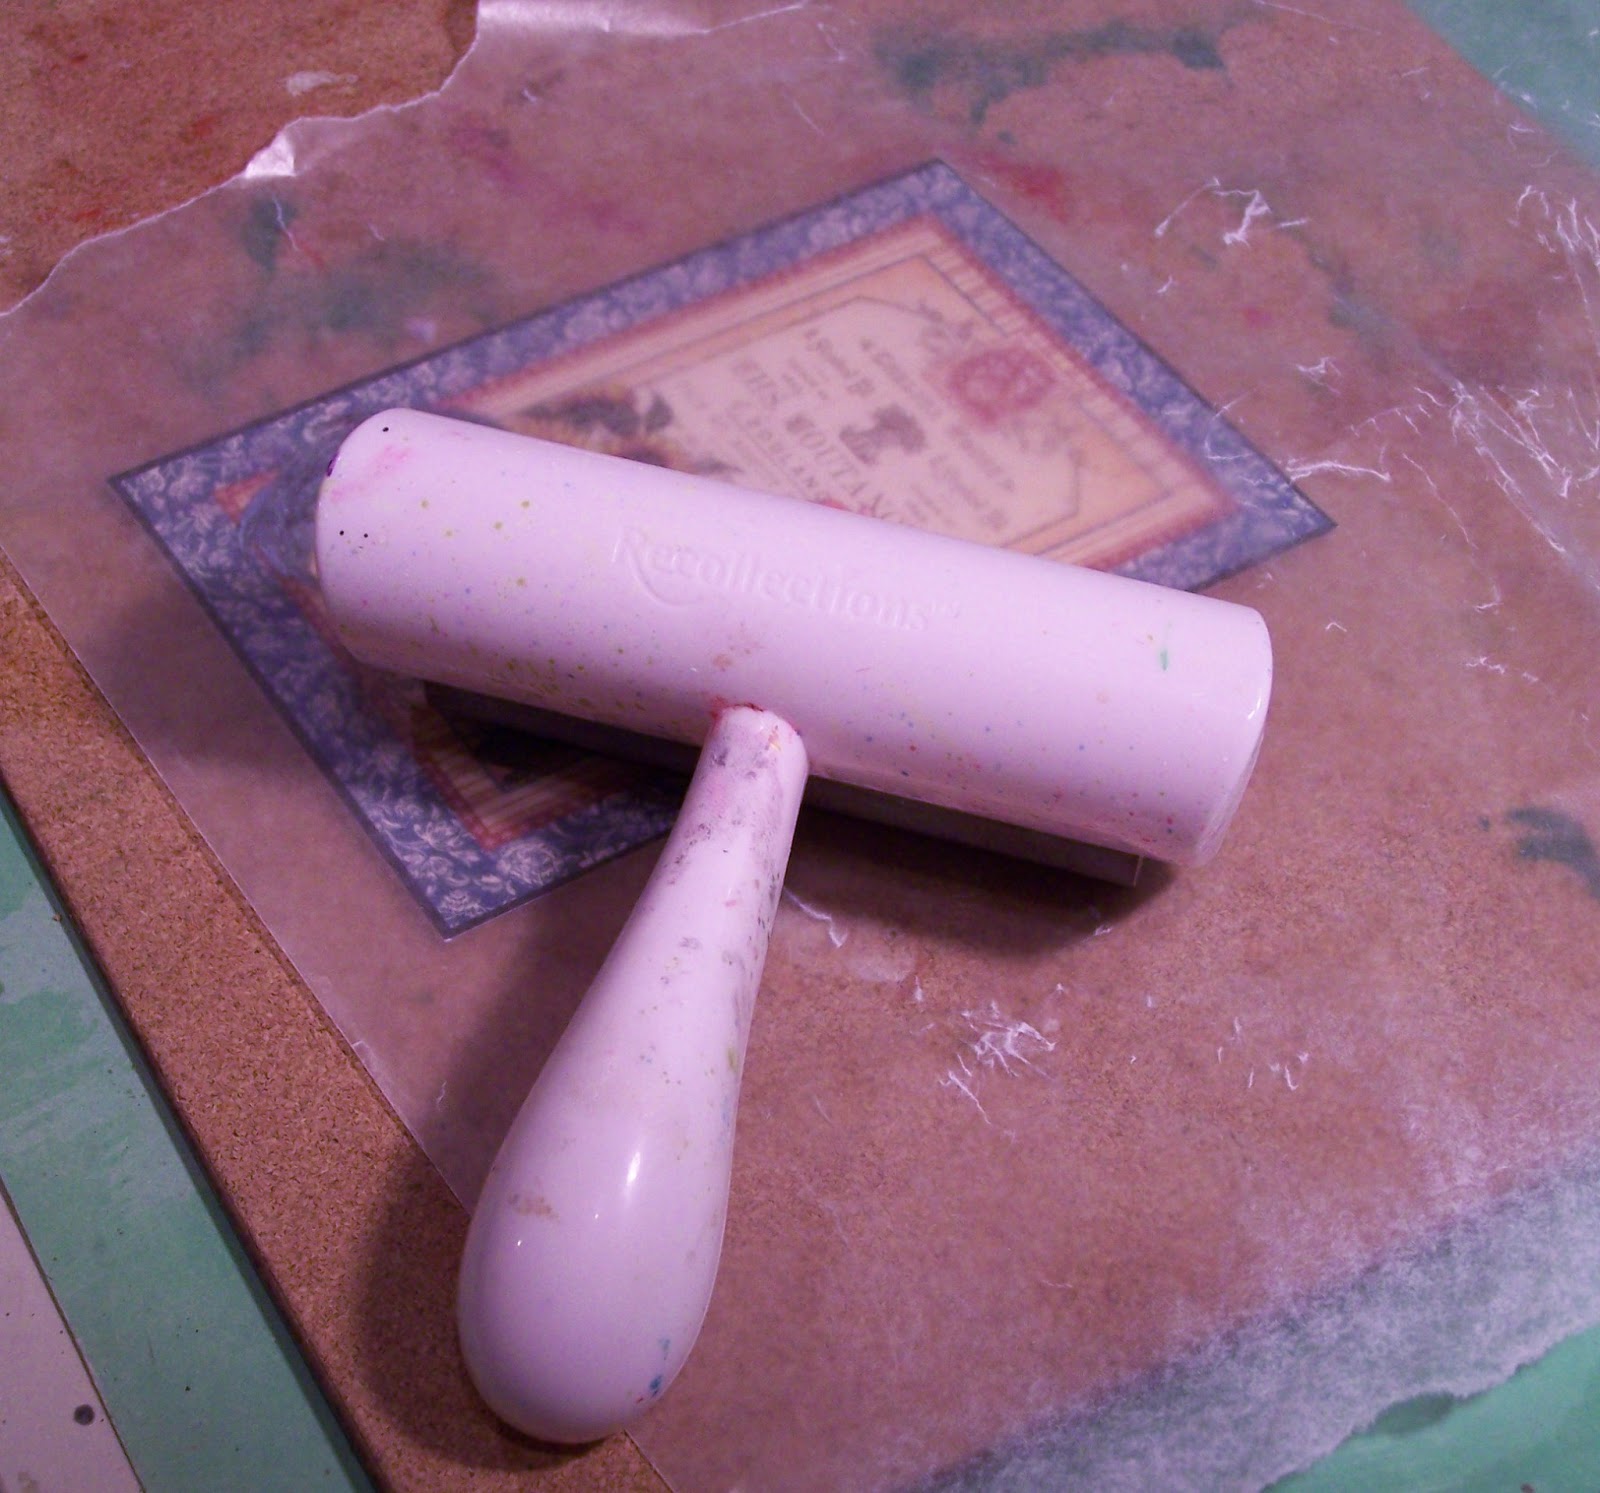
With the paper cut, the next step is to adhere it to the box.

Cover the piece with clean wax paper and use a brayer (or your hand) to get the best
adhesion.

Once the glue is dry ink the
edges with Distress Stain.
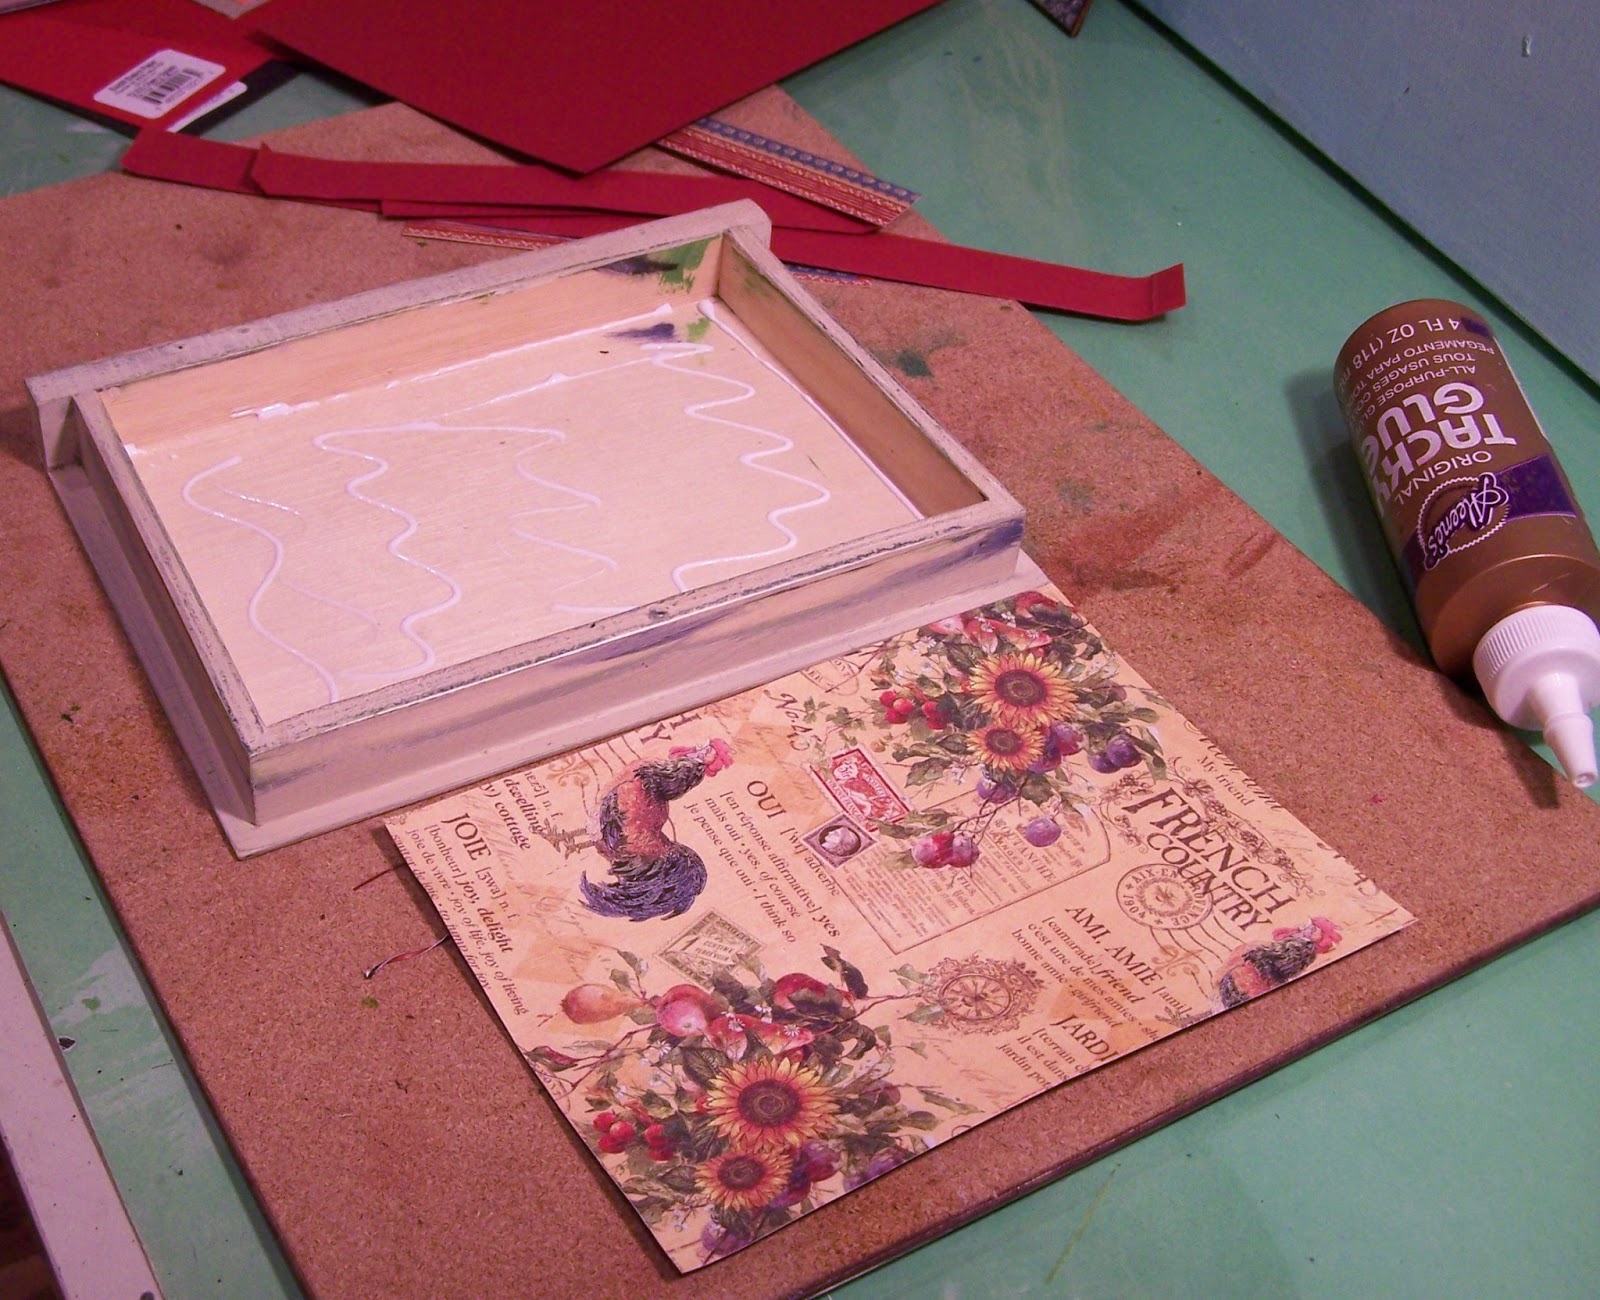
Attach the bottom inside paper first. Again
cover with clean wax paper, and use your fingers or a small brayer to press
paper into place. You can now attach the
inside edge pieces.
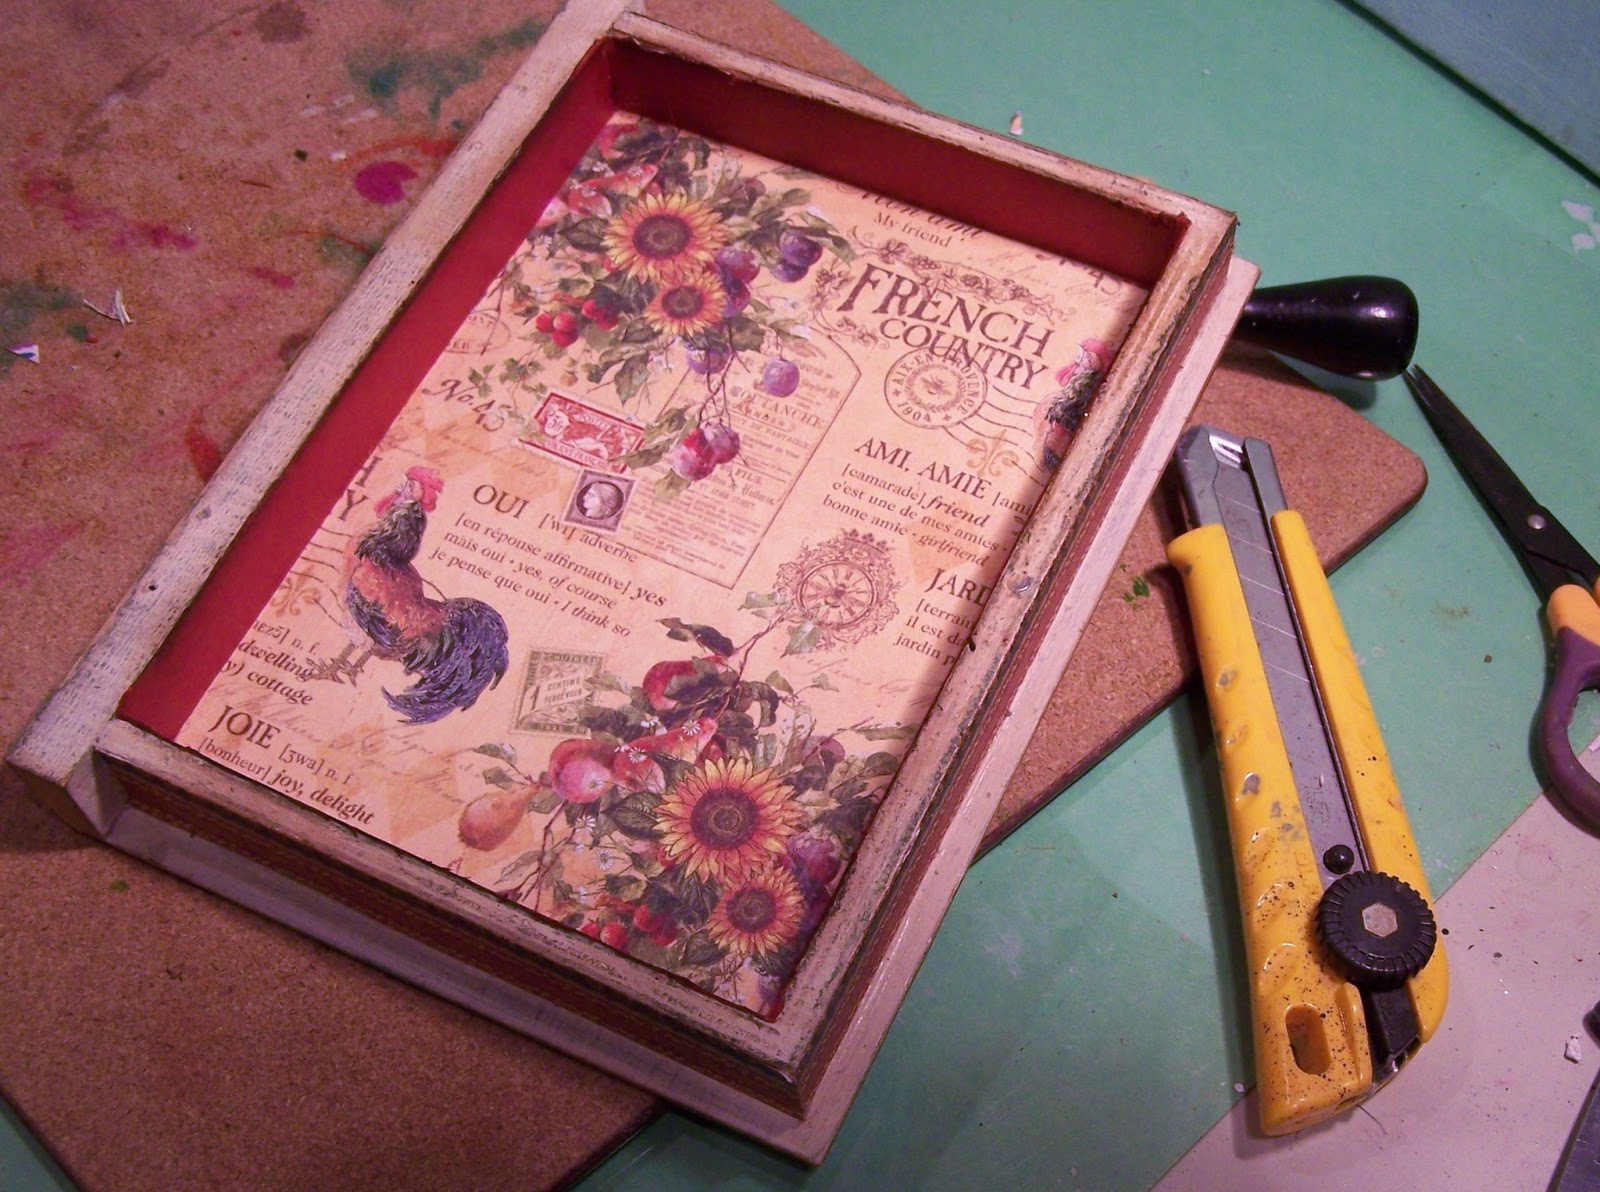
Allow the glue to dry thoroughly before trimming with a craft knife (or
scissors). Then ink the edges of the
paper with the Distress Stain.

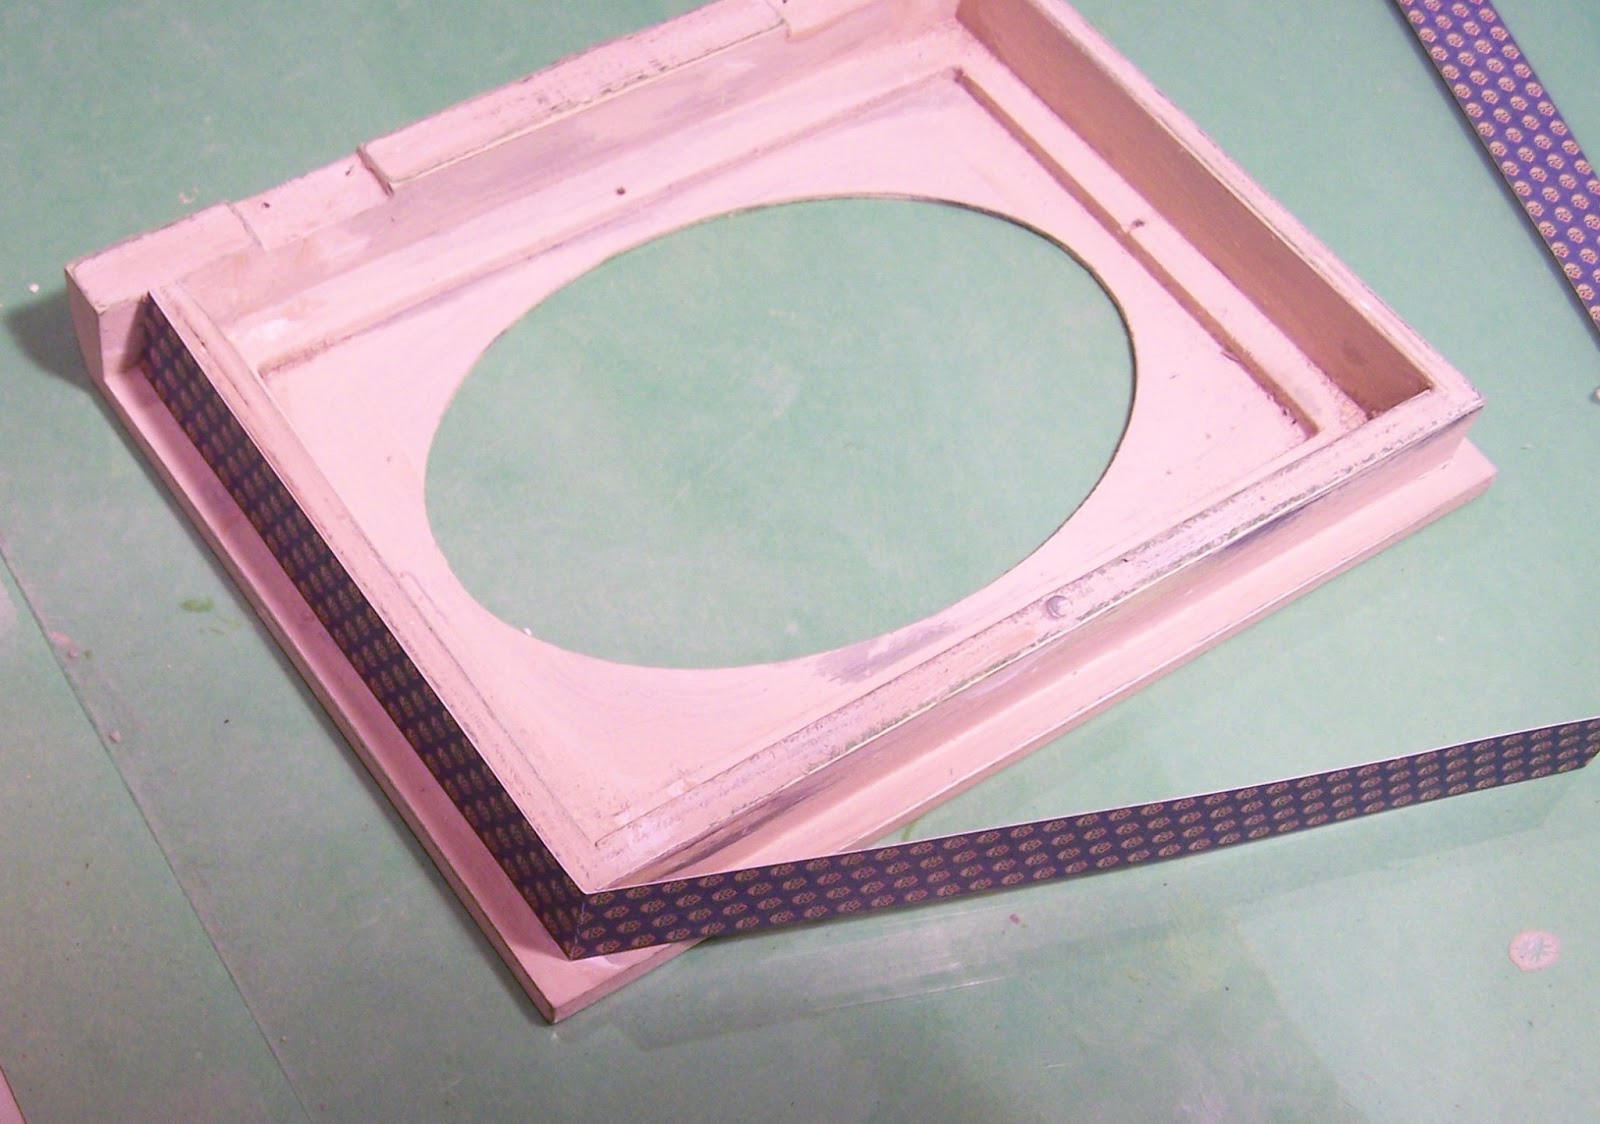
To cover the frame - adhere the frame to the centre of the covering
paper. On the inside and outside
fold-over allowances cut small “v”
notches pointing towards the frame at ½” intervals. Once notches are cut all around, spread glue on both the frame and the paper
and fold the tabs to the underside of the frame. Let dry, then apply a coat of Mod Podge to
the entire frame.

this short video demonstrates covering the chipboard frame...
After the Mod Podge is dry apply Distress Ink to both the inside and
outside edges of the frame.

To cover the spine you want to use a single piece of paper cut down the
centre after adhered. I found elastics
worked well to keep the box together while the glue dried, then a quick slice
with the craft knife and the spine is ready for Distress Ink.
The box can now be reassembled with the hinges.
My favourite part of any project – the flowers! The sunflowers and leaves are fussy cut from the French Country – Sunflower paper. There are petals cut from scraps of the same collection and the white Prima Flower petals were painted with yellow and orange acrylic paint.
 When cutting petals ensure you cut towards the centre to separate the
individual petals. Once cut, use the
Distress Ink on all the edges (this really gives the petals the same look and
feel). Use a small chopstick to curl the
petals, and then shape them around your fingertip.
When cutting petals ensure you cut towards the centre to separate the
individual petals. Once cut, use the
Distress Ink on all the edges (this really gives the petals the same look and
feel). Use a small chopstick to curl the
petals, and then shape them around your fingertip. Play with arranging the petal stacks (colour, number of petals, shapes of petals, etc. ). After dry arranging the petals, assemble into flowers using foam pop dots for dimension between some of the petal layers.
Now dry arrange the flowers on the box before attaching with Tacky Glue
or a hot glue gun.
The finishing touch on the memory box is a chipboard key attached with
a ribbon and stickpin – all items I had laying around.


I sure hope this project inspires you to create an altered object
project.
Have a creative time!
No comments:
Post a Comment
Thanks for taking the time to leave me a comment!